
So we started off with our "extreme" pose. With auto-keying set, each time a bone or IK controller is moved, Blender automatically creates a key frame for you.
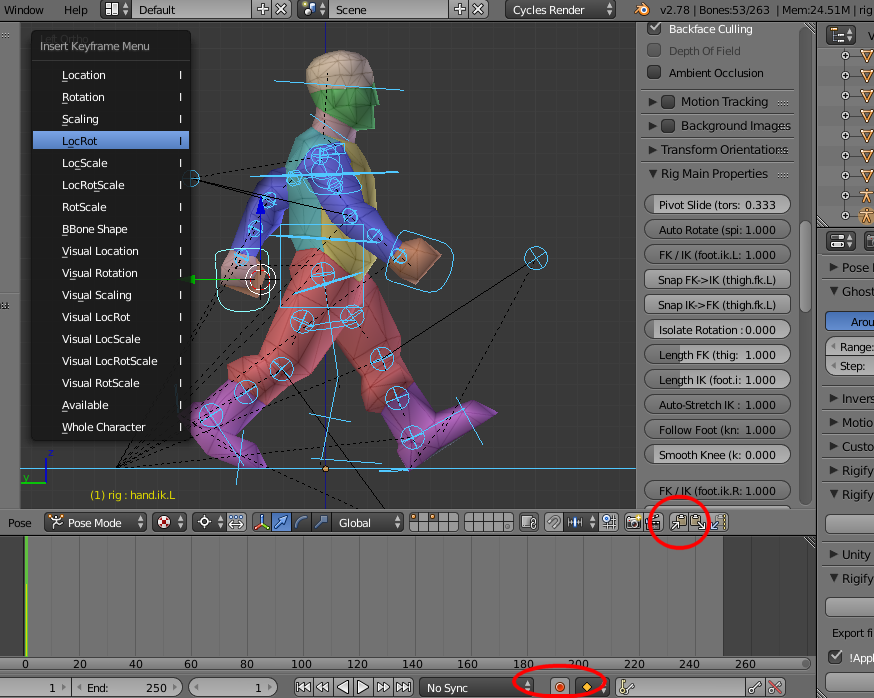
We used the IK controllers on the hands and feet to create a classic walking pose. For good measure, in pose mode, we selected all the bones in the rig and - via the Space popup menu - hit "insert keyframe". Then, with all the bones still selected, hit the copy pose button.
Then, forty frames on, we hit the "paste reversed" button. It's the second of the two paste buttons. A perfect mirror image of the pose appears.

Then, forty frames further on again, we paste the original pose (not mirrored). In the section at the bottom, we set the animation to run from frames 1-80 and hit play. Already we have a simple (albeit rather clumsy) walk animation.
So we now need to create the "crossover pose". This is the pose, exactly half-way along the animation, where one leg crosses over the other. While we're about it, we made a few tweaks to the crossover pose.
It's at this point in a walk action, where the "front" leg is taking the entire weight of the body. It's also where the character is getting ready to "spring" into the next pose. As such, the body needs to be compressed slightly - the front leg bent slightly, ready to push off with the next step. So we grab the hips and pull them down slightly.

Because our hands are still set to IK (inverse kinematics) they remain exactly in place, even though the entire body has shifted down a little (almost as if they were holding onto some invisible bars, keeping them at their current level). So we grab each hand and pull them down, towards the floor, a little bit.
Then, forty frames further on, we paste a mirrored copy of this cross-over pose. Already our walk cycle animation looks much better.
Now that's a bit more like it. It's not perfect, but with just two major poses (mirrored at the appropriate points in the animation) our walk cycle has a lot more life in it!
If you watch the animation back, the character appears to "ride on his heels" for a long part of the walk. We would prefer his foot to be flat to the floor for a longer time during the animation.
So between the extreme and the crossover poses, we created another keyframe, this time placing the foot flat on the floor (and turning the toes a little to flatten the foot out completely).

After watching the animation through a few times more, we found a slight - ever so slight (in fact, probably not even noticeable once the character is in a game world, animated, and viewed at a distance from a slightly overhead view-point) problem. As the foot slides back, from the crossover to the extreme pose, it can dip below the floor line.

Another key frame and a quick tweak, and the animation is pretty much done. For now, anyway. There's no real character to the walk - no gait, or anything to indicate whether this is a light or heavy person. But it's a start!
In hindsight, we'd probably make this animation run over 60 frames, not eighty. As it is, the character appears to be walking quite slowly. So we should either speed it up a little, or play about with the key-frames, making the rise take longer, and the "fall" into the crossover position quicker, to indicate a slow, heavy, lumbering character.
There are probably plenty of ways we can add a little more character to the animations. But for now, we're just getting used to mixing IK and FK controllers to create simple animations for our Unity game. Next up.... getting the animations to play in Unity!
No comments:
Post a Comment